Portal
Create your first container app and get a public URL — from the quick-create Container Apps portal or the full Azure portal.
Two portals, two speeds
You can create a container app from either of two portals, depending on how much control you want. Both produce the same kind of resource — the difference is how many choices you make during setup.
Azure Container Apps portal — quick create
The Azure Container Apps portal is a purpose-built, opinionated experience. It picks sensible defaults for you — public ingress, scale-to-zero, and your last-used region — so you can go from an app name to a running URL in a couple of clicks, without choosing an environment type or configuring networking first. Use it when you want to ship fast and tune the details later. Create in the Container Apps portal.
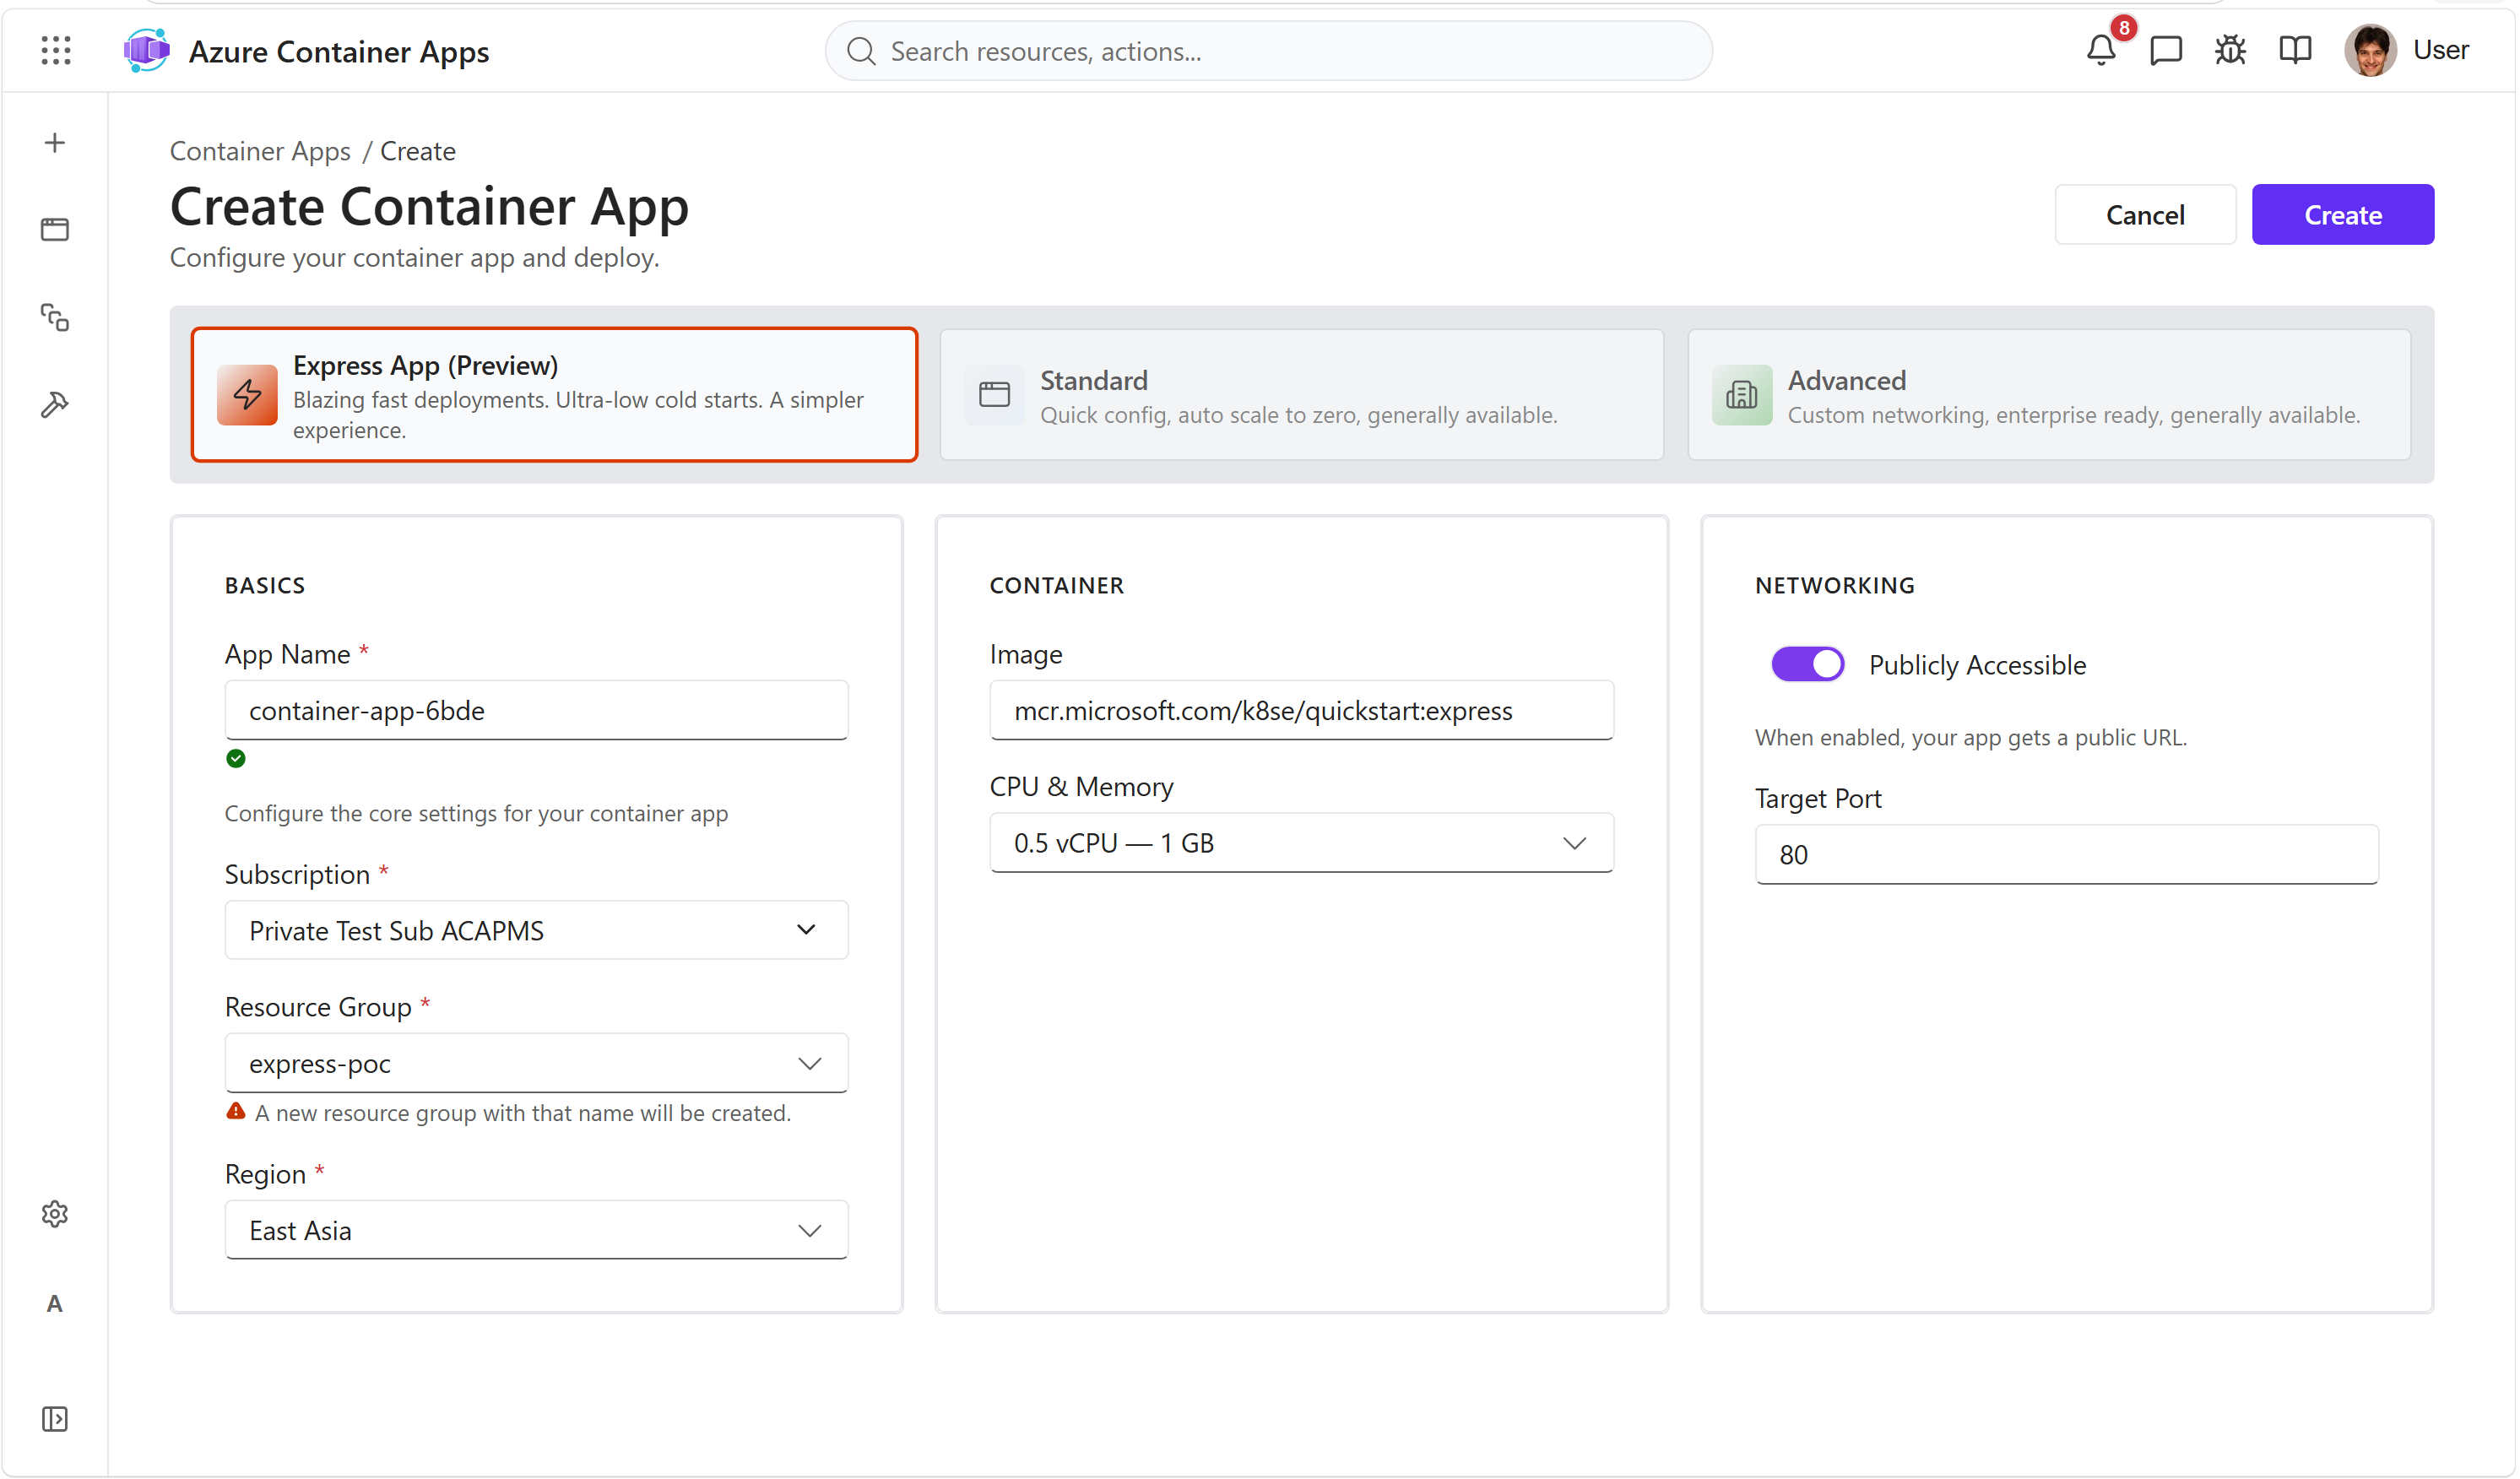
Azure portal — all settings
The Azure portal exposes the full Container Apps model — custom VNets and subnets, workload profiles, managed identity for registry authentication, environment variables, custom scale rules, and lifecycle policies. Choose it when you need advanced configuration or you're connecting the app to existing infrastructure. Create in the Azure portal · Quickstart on Microsoft Learn.

Provisioning takes a few seconds. The app appears in the Container Apps list with status Running.
Click the app name to open it. The Overview tab shows the app's public URL with a copy button. Open the URL in your browser — or request it from a terminal:
curl https://<your-app-url>
The Container Apps welcome page appears, served by the container you just deployed.
Next steps
- Bicep quickstart — do the same thing from a template.
- CLI quickstart — do the same thing from a terminal.